


Joining Together New Balls of Tube/I-cord Yarn


Illimani Yarns Amelie, is a blend of alpaca, merino and mulberry silk, but rather than being spun together, the structure of the yarn is actually a knitted tube with fluffy fibres dispersed inside. Essentially it is just like a mini i-cord! It seems that there are a few yarns on the market these days that use this wonderful construction, which produces a yarn that it so impossibly lightweight, yet still has the much loved properties of wool and alpaca.

However, because of this type of construction for i-cord yarns, a cut end of these types of yarns, will have the tendency to unravel, just like any knitted tube would, creating unslightly hanging threads. And, when it comes to joining new balls together in your projects, these types of yarns cannot be easily spliced together and knots are never the best idea.
So, to help with the task of joining new balls together as well as hiding and securing those loose, unravelling threads of i-cord yarn, I thought I'd make a little tutorial of the technique I use.
In this example, I'll be using Illimani Amelie, in 2 different colours, to make it easier to distinguish between the old yarn attached to your project (Brown/on the left of each photo) versus the new ball of yarn (Light Grey/on the right of each photo). Obviously, you'll most likely be using one colour!
As always, with joining new balls of yarn, it is recommended to join in new balls at the edges of project, rather than right in the middle of row. For projects made in a circular construction, pick an inconspicuous area, such as at the side of the body of a sweater, or on the underside of a sleeve.
Joining new balls of I-cord yarn Together
Tutorial Begins
You will need:
Tube/I-cord style yarn
a darning needle or tapestry needle (whatever you wanna call it!)
scissors
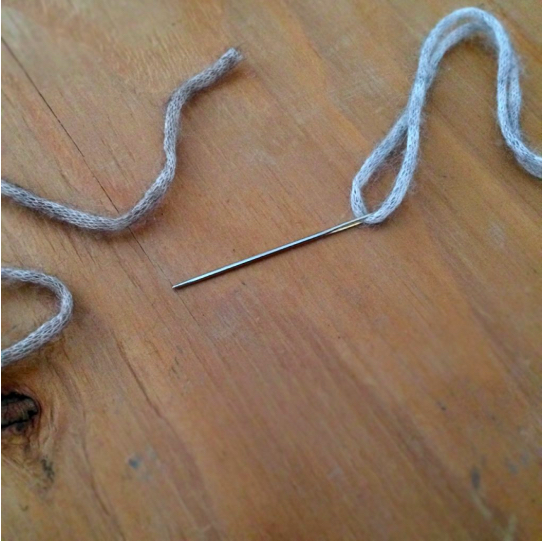
Start by threading your needle onto the end of the new ball of yarn to be added to your project.

2. Insert the needle into side of the old yarn still attached to your project, going directly inside the i-cord tube from right to left, and leaving about 4-5 inches of length. Make sure your needle goes cleanly inside, without catching up the sides.

3. Move the needle inside the yarn for about 1 -1 1/2 inches and then allow it to come out through the side of the yarn...
...and pull it all the way out. You don't want to make the section where the yarn is inside the other yarn too long, since these areas will create a thickness in your work. Just enough so that this area will be about 1-2 sts once knitted (or crocheted).

4. Now take your needle off the new yarn, and thread it onto the old yarn tail.

5. Locate the spot where the new yarn had entered the old yarn, and as close as you can get on the new yarn, insert the needle inside the tube of the new yarn, moving from the left to the right.

6. Again, move the needle along inside the yarn for about 1-1 1/2 inches, then allow it to come out through the side of the yarn.

7. Cut the extra lengths of yarn away, being cautious not to cut too close where the yarn is coming through the yarn. Give each side of the newly joined yarn a gentle tug, so that the cut ends pop inside the yarn.
Done!
I used this same technique to join Quince & Co. Kestral together in my pattern Halistrom. The yarn is a similar construction, although it is a pure linen.

A similar method can be used for weaving in your ends, whereby you insert the loose tail inside the stitches close to it, following the path of the loops.
:)
- Chi